Contents
build.gradleの設定
依存関係に、spring-boot-starter-webとspring-boot-starter-thymeleafを追加してください。
plugins {
	id 'org.springframework.boot' version '2.6.3'
	id 'io.spring.dependency-management' version '1.0.11.RELEASE'
	id 'java'
}

group = 'com.springhack'
version = '0.0.1-SNAPSHOT'
sourceCompatibility = '11'

repositories {
	mavenCentral()
}

dependencies {
	implementation 'org.springframework.boot:spring-boot-starter'
	implementation 'org.springframework.boot:spring-boot-starter-web'
	implementation 'org.springframework.boot:spring-boot-starter-thymeleaf'
}
spring-boot-starter-web
spring-boot-starter-webを依存関係に追加することで、
コントローラー作成で必要になる、
・@Controller
・@RequestMapping
といったアノテーションが使用できるようになります。
spring-boot-starter-thymeleaf
spring-boot-starter-thymeleafを依存関係に追加することで、
コントローラーの実行メソッドでreturn "xxx"としたときに、
resources/templates/xxx.htmlをレスポンスしてくれるようになります。
コントローラーの作成
@Controller
public class IndexController {
    @RequestMapping("/")
    public String index() {
        return "index";
    }
}
HTMLテンプレートの作成
HTMLの中身はなんでも構いませんが、
resources/templates配下にHTMLファイルを置いてください。
<!DOCTYPE html>
<html lang="en">
<head>
    <meta charset="UTF-8">
    <title>子どものお小遣い帳アプリ</title>
</head>
<body>
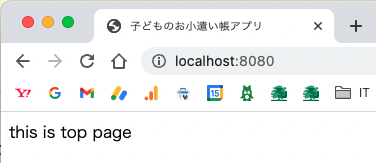
    this is top page
</body>
</html>
動作確認
Gradle bootRunを実行してアプリを起動し、ブラウザでlocalhost:8080にアクセスします。

画面表示されていればOKです。